On this page, you will click the iCal button next to your listing name and select the Export option. You will get a pop up with a Link or URL that you need to copy.
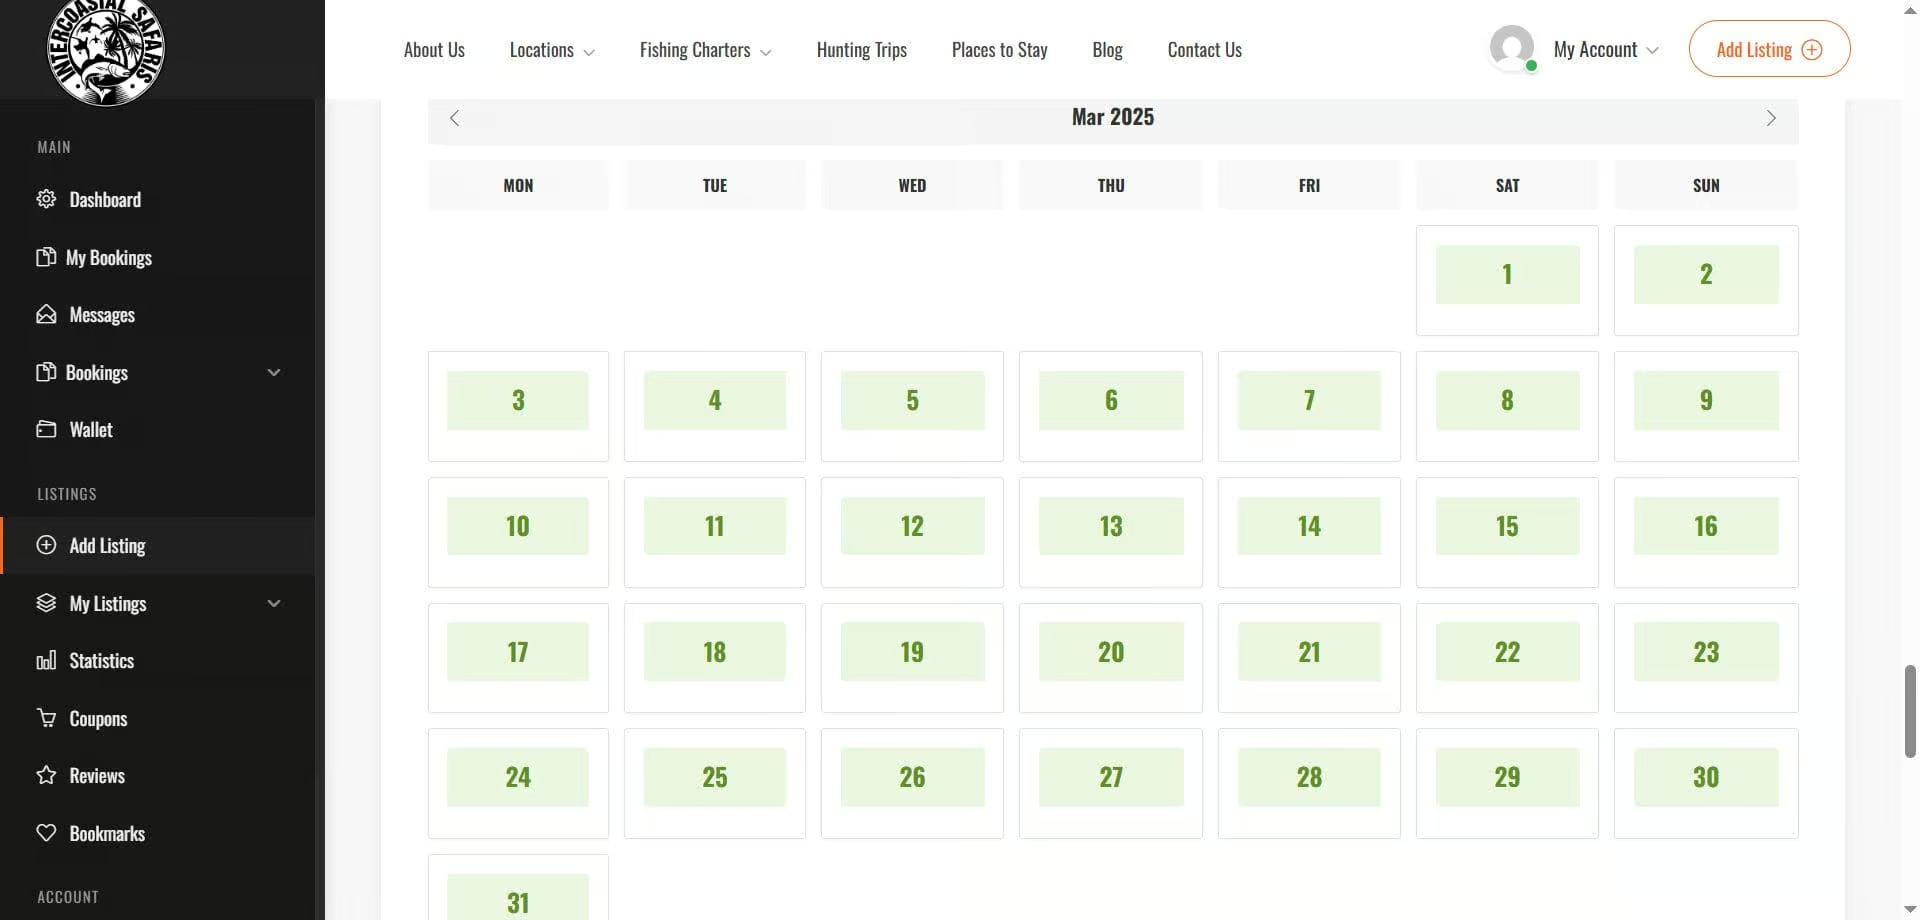
On this page, you will click the edit button next to your listing name and scroll to the bottom of the page. Here you will see a full calendar, you can select dates to block off. Dates that are blocked off will turn red. Once you select the dates you want to block off, click the submit button at the bottom of the page.
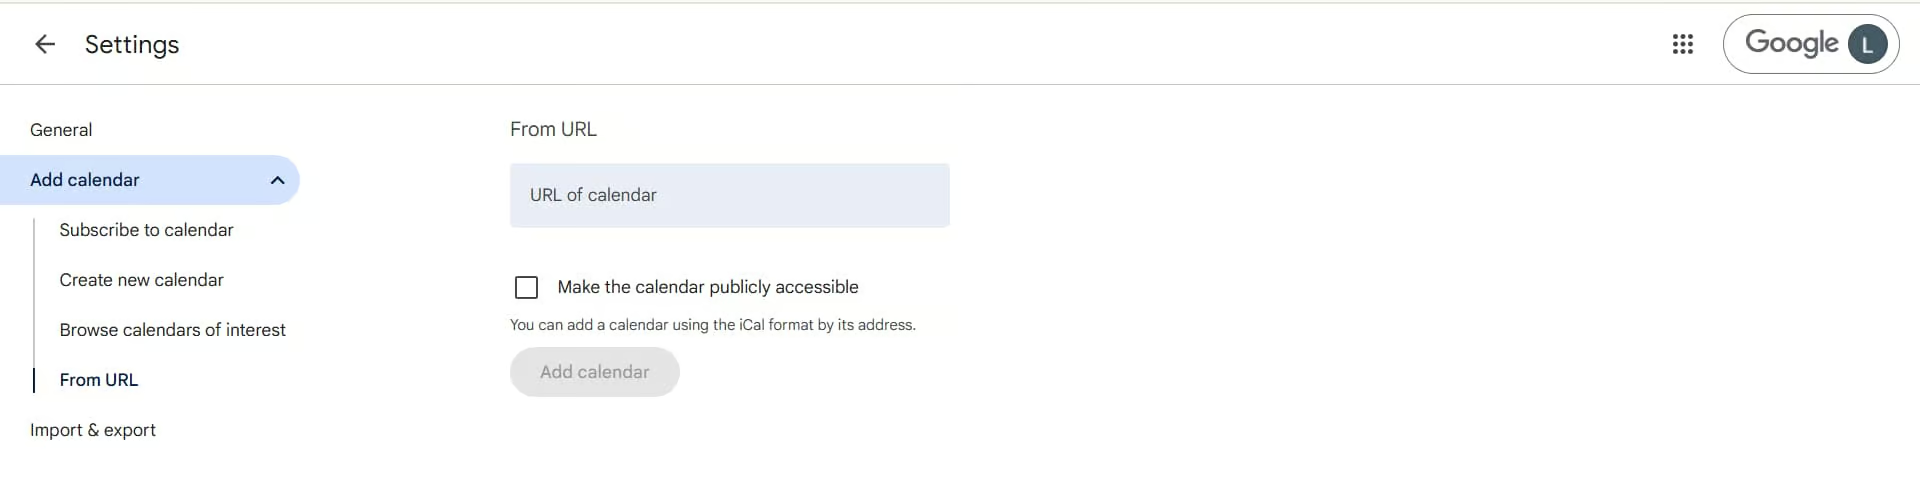